in 3-D
for // viewing

|
in 3-D for // viewing |
|
 |
 |
| HOW TO: Stare at center black division and let your eyes
relax. With a little practice, you will be able to fuse the two photos
into one and see the picture in "3-D." You will feel like your
eyes are looking beyond the images at first. When you're finally
able to view the 3-D image you may notice the two original images off to
the sides. This imaging is a lot easier to bring into focus than
the 3-D computer artwork that has been so popular in the past decade.
Once you are practiced at this, you will be able to view the 3-D effect
anywhere from 8 inches to 3 feet or more away from the screen.
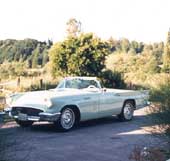
If you are wondering how to take 3-D pictures, it's a fairly simple process. I've been doing this for a number of years with just a basic camera and without a tripod. Most of my older shots were taken with a simple Kodak Instamatic. It's just a matter of taking two pictures of the same object; only moving the camera 2 to 8 inches left or right for the 2nd shot, from the original shot. Try to keep the camera at the same level for each shot and be aware of where the center of the shot is. If you are doing a photo where the main object is a great distance away such as for cloud pictures, then you will want to move even farther apart (up to 4 feet, maybe even more) to get the 3-D effect. Also, a far away object will look better if you have a close object also in the picture. Once the photos are developed, the next tricky part is making sure the "right" picture is to the right of the "left picture. If not, you will see a "reverse" dimensional picture that will drive your eyes/brain crazy. It really helps to have a stereoscope to view the photos after developing to get them on the correct sides but it is not necessary. Below are more 3-D pictures to practice with. |
 |
 |
| If you are interested in making your own webpage 3-D photos, I found
that a width of 180 pixels at 72dpi or about 2 inches for each photo was
just about ideal for the imaging. I tried larger photos but just
couldn't get my eyes to merge them together correctly. Maybe with
practice it could be done but this size works for sure.
Update on the above (June 26, 1999): I have been able to get the same effect with larger photos. As you go thru my pages (other pages not uploaded yet) you will find some with larger photos. The smaller photos merge the quickest. It really helps if there is no glare on the screen., Update #2 (June 29, 1999): I'm learning new things fast. These pages are set up for "Free-viewing" with the "parallel method." Free viewing means looking at the 3-D images without aids, in other words, with just your eyes. There are 2 basic methods for "free-viewing." One is the parallel method, which these pages use, and the other is the "crossed eye" method which I will experiment with on these pages at some later date. |
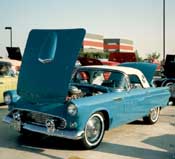
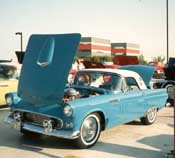
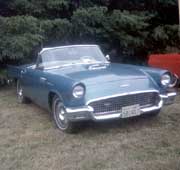
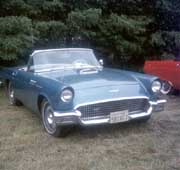
This is a shot of Ford & Nell's '56 taken at the CTCI convention in Dallas in 1988
 |
 |
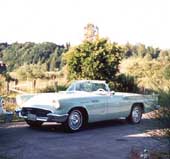
Our car when it was blue
 |
 |
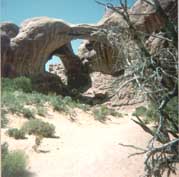
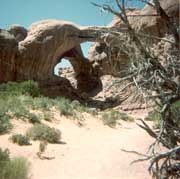
some scenery at Arches National Monument in Utah
July 1983
 |
 |
|
I was inspired to do this page by this webpage of Albert Richards, Professor Emeritus, University of Michigan. If he could do the 3D imagery on a webpage then I should be able to. And it worked. I've since found other sites with 3-D photos and 3-D computer art. Thank you, Chris, for cluing me into the National Stereoscopic Association webpage. Many links to follow from that page for more stereo viewing. |
©1999 - 2003
Dot Lang